Exercise 2 - Tracking cancer cell migration in time-lapse movies
Cancer cell migration, image from Zenodo.
Open the above time-lapse sequence in Fiji and run the command:
Plugins › Tracking › TrackMateYou will be presented with a
TrackMatewindow. ClickNext.Select
StarDist detectorfrom the drop-down menu. ClickNext.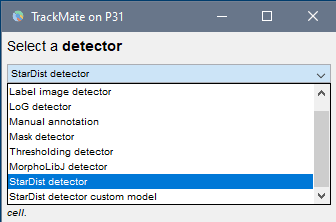
Segmentation detector You can now click on the
Previewtab, to check how well StarDist is detecting the nuclei on the current slice. If detections look fine, click next to detect nuclei in the whole time-lapse sequence.
Keep clicking
Nextbutton until you reach theSelect a trackerwindow. SelectSimple LAP trackerand clickNext.
Choose settings as in the image below and clickNext.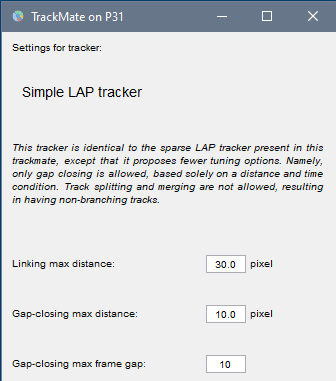
Simple LAP tracker
If you want to track splitting and/or merging events, then choose the LAP tracker, and tick the splitting/merging checkbox under settings.
Keep clicking next until you reach the
Display optionswindow (see image below, left). Here, various display options for the tracks could be selected. ChooseShow tracks backward in time. Play with different settings here and scroll through the stack to see the effect of these changes.Please explore the three tabs at the bottom -
TrackScheme,TracksandSpots. A lot of statistics is hidden there, such as the raw values for each nuclei in each frame of the time-lapse. All the statistics could be exported to a CSV file.
Keep clicking next until you reach the last window called
Select an action(see image below, right). SelectCapture overlayand clickExecuteto generate a time-lapse movie with spots and tracks overlaid on top of the original data.
A label time-lapse movie could also be generated by selecting
Export label imagefrom the drop-down list and clickingExecute.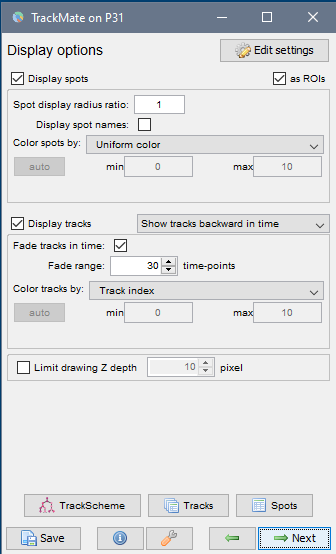
Display options 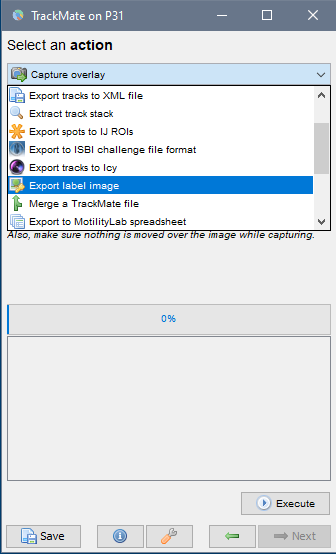
Select an action
Final result: